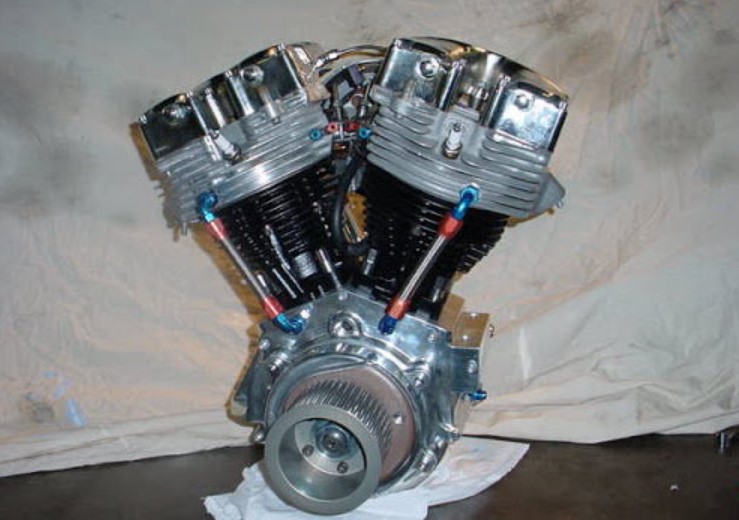
How To Remove Generator From Engine Shaft? 9 Easy Steps
Are you looking for How To Remove Generator From Engine Shaft? Removing a generator from an engine shaft can be a challenging task, especially for those unfamiliar with engine mechanics. However, with the right tools and knowledge, this process can be simplified. This article will guide you through each step, ensuring a safe and efficient removal process.
Key Takeaways
- Understanding the significance of properly removing the generator from the engine shaft.
- Identifying the necessary tools and safety precautions.
- Step-by-step guide for removing the generator.
- Tips to handle common issues encountered during the removal process.
How To Remove Generator From Engine Shaft?
Removing a generator from an engine shaft is a procedure that demands care and precision. Here’s a detailed guide:
1. Safety Precautions
- Power Off: Ensure the engine and generator are completely turned off. This is crucial to prevent any accidental startups or electrical hazards.
- Cool Down: Allow the engine to cool down if it has been running. This reduces the risk of burns or other injuries.
- Disconnect Battery: For generators integrated with an electrical system, disconnect the battery to eliminate any risk of electric shock.
2. Accessing the Generator
- Remove Covers: If the generator is covered or enclosed, remove any panels or covers to access it. This may require unscrewing or unbolting these parts.
- Clean Area: Ensure the area around the generator is clean and free of debris to avoid contamination and to provide a clear workspace.
3. Disconnecting the Generator
- Identify Connections: Locate all electrical connections to the generator. This might include wiring to the battery, grounding wires, and any connectors to the engine.
- Label Wires: It’s a good practice to label these wires for easy reconnection later.
- Detach Wires: Carefully disconnect the wires. Use the appropriate tools, like wire cutters or pliers, if needed.
4. Loosening the Generator
- Identify Mounting Bolts: Generators are usually attached to the engine via mounting bolts or brackets.
- Loosen Bolts: Use a wrench or socket set to loosen and remove these bolts. Keep the bolts in a safe place for reassembly.
5. Removing the Generator
- Check for Snags: Ensure that no wires or other parts are snagging the generator.
- Gently Remove: Carefully slide the generator away from the engine shaft. This might require some gentle wiggling to free it from its position.
- Support Weight: Be mindful of the generator’s weight to prevent dropping it or causing strain to your back.
6. Post-Removal Inspection
- Inspect Generator: Once removed, inspect the generator for any signs of wear, damage, or needed repairs.
- Inspect Engine Shaft: Look over the engine shaft for any irregularities or signs of wear that could affect the new or reinstalled generator.
7. Preparing for Reinstallation or Replacement
- Clean the Area: Clean the area where the generator was mounted to ensure a smooth installation process.
- Check Alignment: If you’re reinstalling the same or a new generator, make sure it aligns correctly with the engine shaft before securing it.
8. Reinstallation (if applicable)
- Reverse Process: Follow the removal steps in reverse order to reinstall the generator. Ensure all connections are secure and the generator is firmly attached to the engine.
9. Testing
- Reconnect Battery: If you disconnected the battery, reconnect it.
- Test Run: Start the engine to ensure that the generator is functioning correctly. Look for any unusual noises or vibrations.
Remember, this process can vary slightly depending on the generator and engine type. Always refer to your specific engine and generator manual for tailored instructions. In case of any doubts or if you encounter difficulties, it’s advisable to consult a professional mechanic.
Preparing for the Removal Process
Before starting the removal process, it’s important to gather all necessary tools and understand the safety precautions.
Tools and Equipment Required
- Wrench set
- Screwdrivers
- Safety gloves
- Protective eyewear
Safety Precautions
- Ensure the engine is turned off and cooled down.
- Disconnect the battery to prevent electrical hazards.
Troubleshooting Common Issues
During the removal process, you might encounter issues such as rusted bolts or inaccessible parts.

Dealing with Rusted Bolts
- Use a penetrating oil to loosen the bolts.
- Apply gentle but firm pressure to avoid breaking the bolts.
Handling Inaccessible Parts
- Use extension tools for hard-to-reach areas.
- Be patient and avoid forcing any components.
Generator Shaft Maintenance
After removing the generator, it’s a good opportunity to inspect and maintain the engine shaft.
Inspection and Cleaning
- Check for any signs of wear or damage.
- Clean the shaft to remove any debris or corrosion.
Lubrication
- Apply a suitable lubricant to prevent future corrosion.
Reinstallation Tips
If you’re planning to reinstall the generator or a new one, there are some tips to consider.
Aligning the Generator
- Ensure the generator is properly aligned with the engine shaft.
- Tighten all bolts and connections securely.
Testing
- Reconnect the battery and test the generator for proper functioning.
Advanced Troubleshooting Techniques
Sometimes, the removal of a generator from an engine shaft can present unique challenges that require advanced troubleshooting techniques.

Overcoming Stuck Components
- Persistent stuck components might need a more aggressive approach. Consider using a rubber mallet to gently tap around the stuck area.
- Applying heat using a heat gun or torch can expand the metal, making it easier to remove the component. However, extreme caution is necessary to avoid damaging surrounding parts.
Electrical Issues
- Before reconnecting the generator, check for any electrical issues, like frayed wires or loose connections.
- Use a multimeter to ensure there’s no electrical continuity between the generator body and the engine, which could indicate a short circuit.
Refined Reinstallation Strategies
Reinstalling a generator onto an engine shaft requires precision and attention to detail to ensure optimal performance and longevity.
Ensuring Proper Alignment
- Double-check the alignment of the generator with the engine shaft. Misalignment can lead to excessive wear and tear or even failure of the generator.
- Use alignment tools if available, as they can significantly improve the accuracy of your installation.
Final Checks and Balancing
- Once the generator is reinstalled, check the tension of the belts or couplings. Improper tension can lead to inefficiency or damage.
- If possible, perform a balancing test to ensure the generator operates smoothly without causing undue vibrations.
Additional Tips for Efficient Removal and Installation
Beyond the basic steps, there are additional tips that can make the process of removing and reinstalling a generator more efficient.
Organizing Your Workspace
- Keep your tools organized and within easy reach. This saves time and reduces the risk of losing important components.
- Clean your work area to prevent any debris from entering the engine or generator during the process.
Seeking Professional Assistance
- If you encounter issues beyond your skill level, don’t hesitate to seek professional help. Sometimes, expert intervention can prevent costly mistakes and ensure the longevity of your equipment.
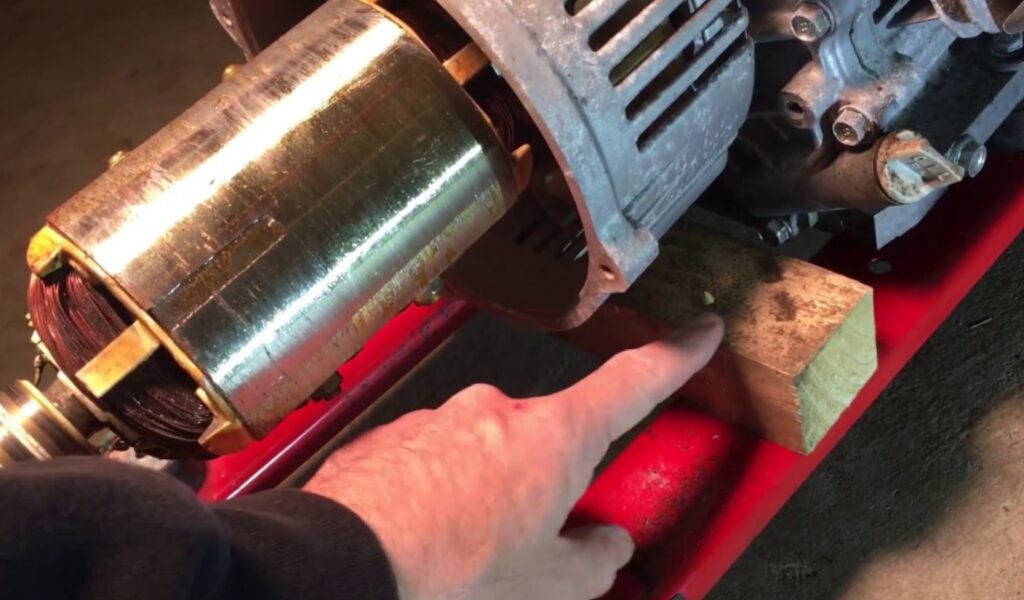
How Do You Remove A Stator From A Shaft?
Removing a stator from a shaft is a technical task that requires precision and care. The stator, an essential component of many electrical motors and generators, is typically fixed around the shaft. Here’s a detailed process for removing a stator:

- Safety and Preparation: Ensure the equipment is powered off. Disconnect any electrical connections to the stator and wear appropriate safety gear.
- Accessing the Stator: Remove any external components or housings that obstruct access to the stator. This may vary depending on the specific equipment.
- Detaching the Stator: The stator is usually bolted or clamped onto the shaft housing. Remove these fasteners carefully.
- Removing the Stator: After loosening the fasteners, gently slide the stator off the shaft. In some cases, a puller tool may be required if the stator is tightly fitted.
- Inspection: Once removed, inspect the stator for signs of wear or damage, as well as the shaft for any irregularities.
This process is generally applicable across various types of machinery. However, it’s important to refer to the specific manual for your equipment, as the procedure can vary. For detailed instructions tailored to specific models and types of machinery, consulting the manufacturer’s guide or a professional technician is recommended.
How Do You Remove A Generator From A Briggs And Stratton Engine?
Removing a generator from a Briggs and Stratton engine involves a series of steps that must be carefully followed to ensure a safe and successful removal. Here’s a guide:

- Safety Precautions: Make sure the engine is turned off and cool to the touch. Disconnect the spark plug wire to prevent accidental starting.
- Accessing the Generator: Remove any covers or panels that are in the way of accessing the generator.
- Disconnecting the Generator: Before removal, disconnect all electrical connections to the generator. This includes unplugging any wires connected to the generator.
- Loosening the Mounting Bolts: The generator will be secured to the engine with mounting bolts. Use the appropriate wrench to loosen and remove these bolts.
- Removing the Generator: Once the bolts are removed, carefully slide the generator away from the engine. Be mindful of any additional wires or components that may be connected.
- Inspection: After removal, inspect both the generator and the area where it was mounted for any signs of wear, damage, or debris.
This process is specific to Briggs and Stratton engines, which are common in various outdoor power equipment. For model-specific instructions, it’s advisable to consult the user manual for your particular Briggs and Stratton engine or contact a professional.
How Do You Remove A Generator Bearing?
Removing a generator bearing is a task that requires attention to detail and precision. Bearings in generators are crucial for the smooth operation of the rotor and their removal, whether for maintenance or replacement, must be done carefully to avoid damage to the generator.

- Preparation: Begin by ensuring that the generator is powered off and disconnected from any power sources. It’s essential for safety to work on a completely de-energized generator.
- Accessing the Bearing: Depending on the generator’s design, you may need to disassemble parts of the housing or the rotor assembly to access the bearing. This often involves removing bolts and carefully taking apart the components.
- Removing the Bearing: Once you have access, assess how the bearing is fitted onto the shaft. If it’s a press-fit bearing, you will likely need a bearing puller or a similar tool to remove it without causing damage. Gently apply pressure with the tool to slide the bearing off the shaft.
- Handling Seized Bearings: If the bearing is seized or difficult to remove, applying a penetrating lubricant can help loosen it. In some cases, gentle heating of the bearing with a heat gun can expand the metal slightly, making removal easier.
- Inspection: After removal, inspect the bearing and the shaft for wear, damage, or corrosion. This can help in diagnosing any potential issues with the generator.
It’s important to note that the specific steps can vary based on the generator’s make and model. Therefore, consulting the service manual for your specific generator model is recommended for precise instructions.
Why Is My Generator Turning Over But Not Starting?
When a generator turns over but doesn’t start, it indicates an issue with one or several components of the generator. There are several common reasons for this issue:
- Fuel Problems: Check if there’s enough fuel in the tank. Also, old or contaminated fuel can prevent the generator from starting. Drain old fuel and replace it with fresh fuel if necessary.
- Air Flow Issues: A clogged air filter can restrict air flow, which is crucial for the engine’s operation. Inspect the air filter and clean or replace it if it’s dirty.
- Spark Plug Issues: A faulty or dirty spark plug can prevent the engine from starting. Check the spark plug for signs of wear or damage and replace it if needed.
- Battery Issues: If the generator has an electric start, a weak or dead battery can be a problem. Ensure the battery is fully charged and in good condition.
- Carburetor Issues: The carburetor might be clogged, especially if the generator hasn’t been used for a long time. Cleaning or servicing the carburetor can resolve this issue.
- Low Oil Levels: Some generators have a low oil shutdown feature. Check the oil level and refill it if it’s too low.
If these basic troubleshooting steps don’t resolve the issue, it may be a more complex problem requiring professional diagnosis and repair.

Conclusion
Successfully removing a generator from an engine shaft requires patience, the right tools, and a methodical approach. By following this guide, you can ensure a safe and effective removal process.
Remember, regular maintenance and proper handling of the generator and engine shaft are key to the longevity of your equipment. This task, though daunting, reinforces the importance of understanding your engine’s components and their interplay.
Top FAQ’s
How do I know if the generator needs to be removed?
Look for signs like unusual noises, decreased power output, or visual damage. Regular maintenance checks can also reveal if removal is necessary.
Can I remove the generator without special tools?
While basic tools can suffice for some aspects of the removal, certain steps might require specialized tools for safety and efficiency.
Can I remove the generator from the engine shaft by myself?
Yes, with the right tools and basic mechanical knowledge, you can remove the generator. However, if you’re not experienced with engine mechanics, it’s advisable to seek professional help to avoid damaging the engine or generator.
What tools are required for removing a generator from an engine shaft?
Essential tools include a wrench set, screwdrivers, safety gloves, and protective eyewear. In some cases, you might need a rubber mallet, heat gun, or a multimeter for advanced troubleshooting.
How do I deal with rusted bolts when removing the generator?
Apply penetrating oil to loosen the bolts. If they’re still stuck, gently tap them with a rubber mallet or apply heat carefully. Avoid using excessive force to prevent breaking the bolts.

Welcome to the exhilarating world of Matt Rex, a professional car racer turned renowned vehicle enthusiast. Immerse yourself in his captivating blog as he shares heart-pounding adventures, expert reviews, and valuable insights on cars, trucks, jets, and more. Fuel your passion for speed and discover the beauty of vehicles through Matt’s engaging stories and meticulous expertise. Join the ever-growing community of enthusiasts who find inspiration and expert advice in Matt Rex’s blog—a digital hub where the thrill of speed meets the pursuit of knowledge.