How Long Does It Take To Remove 5.3 Engine? [Answered]
This article will explain How Long Does It Take To Remove 5.3 Engine? Removing a 5.3 engine, a common powerhouse in many vehicles is a task that requires meticulous planning and precision. Whether you’re a seasoned mechanic or a DIY enthusiast, understanding the time and effort involved is crucial.
The time to remove a 5.3 engine can vary based on several factors, including experience, tools, and the specific model of the vehicle. In this comprehensive guide, we delve into the nuances of engine removal, offering insights and practical tips to streamline the process.
Key Takeaways
- The time to remove a 5.3 engine typically ranges from 4 to 8 hours.
- Factors affecting this duration include mechanical skill, available tools, and the complexity of the vehicle model.
- Proper preparation and organization can significantly reduce the time required.
- Safety precautions are paramount during the engine removal process.
How Long Does It Take To Remove 5.3 Engine?
Typically, removing a 5.3 engine can take anywhere from 4 to 8 hours. This time frame is a general estimate and can vary significantly based on individual circumstances.
For those with extensive mechanical experience and a well-equipped garage, the lower end of this range is more achievable. Conversely, beginners or those with limited tools may find themselves on the higher end of the spectrum.
Factors Influencing Time
- Experience Level: A seasoned mechanic will navigate the process more swiftly than a novice.
- Tool Availability: Specialized tools can expedite the removal process.
- Vehicle Model Complexity: Some vehicles are designed with more accessible engine compartments, reducing removal time.
Preparatory Steps for Engine Removal
Proper preparation is a key factor in efficiently removing a 5.3 engine. This involves gathering all necessary tools, ensuring a clean and organized workspace, and familiarizing oneself with the vehicle’s engine layout.
Essential Tools and Equipment
- Engine hoist or crane
- Standard mechanic toolset including wrenches, sockets, and screwdrivers
- Engine stand for securing the engine post-removal
Safety Measures and Precautions
Safety should always be the top priority. This includes wearing protective gear, disconnecting the battery, and ensuring the vehicle is securely lifted and supported.

Crucial Safety Gear
- Protective gloves and goggles
- Sturdy work boots
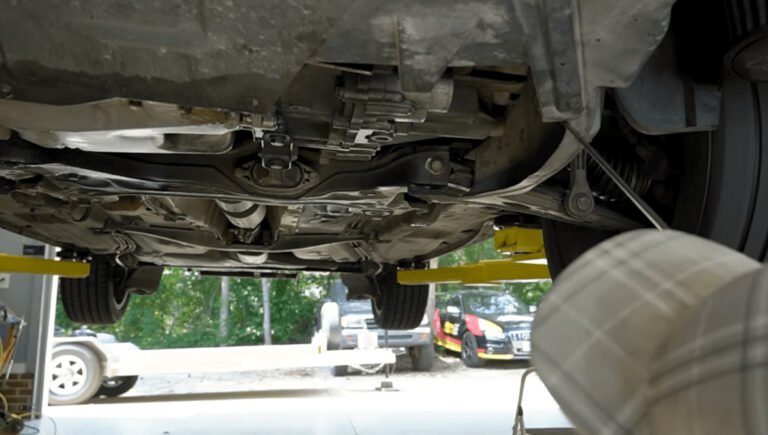
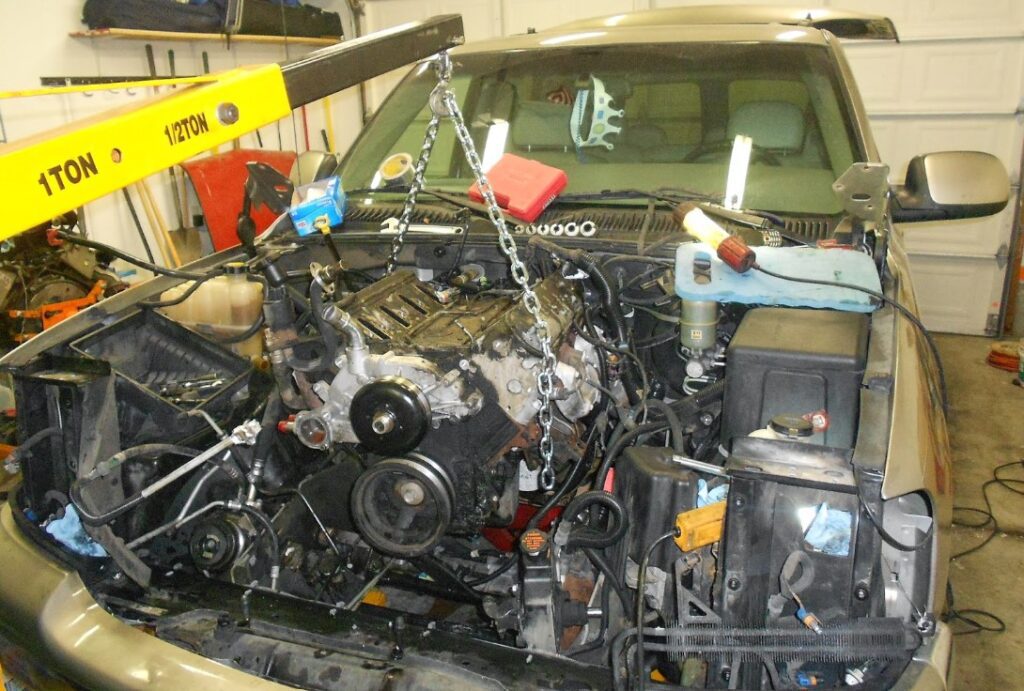
Step-by-Step Guide to Removing a 5.3 Engine
The engine removal process is intricate and involves several key steps. This includes disconnecting all electrical connections, fuel lines, and exhaust components, followed by carefully lifting the engine out of the vehicle.
Detailed Removal Process
- Disconnect electrical components and battery.
- Remove fuel lines, air intake, and exhaust connections.
- Carefully lift the engine using an engine hoist.
Common Challenges and Solutions
During engine removal, various challenges can arise. These may include stuck bolts, limited space for maneuvering, and properly aligning the engine hoist.
Overcoming Obstacles
- Use penetrating oil for stuck bolts.
- Carefully plan the lifting path for the engine.
Time-Saving Tips and Tricks
Experienced mechanics often have a repertoire of tips and tricks to expedite the engine removal process. These can include organizing tools beforehand, labeling all disconnected components, and ensuring a clear workspace.

Efficiency Enhancing Strategies
- Pre-organize tools and parts.
- Label and document all disconnections.
Advanced Techniques for Engine Removal
Mastering advanced techniques can further reduce the time taken to remove a 5.3 engine. These techniques often stem from a deep understanding of the engine’s design and an ability to foresee potential challenges.
Utilizing Advanced Tools
Advanced tools, such as pneumatic or electric wrenches, can significantly speed up the process of loosening bolts and nuts. Additionally, using a tilting engine hoist can help navigate the engine out of tight spaces more efficiently.
Strategy in Engine Disassembly
Approaching the engine disassembly with a strategic mindset is crucial. This involves understanding the sequence of parts removal to avoid redoing work. For instance, removing certain components like the radiator first can provide more space for engine maneuvering.
Dealing with Rust and Corrosion
Rust and corrosion on older engines can be a major hindrance to quick removal. These issues require special attention and techniques to overcome without causing damage to the engine or the vehicle.

Effective Rust Removal Techniques
Using rust penetrants and allowing sufficient time for them to work can ease the removal of corroded bolts. In severe cases, heating the bolts gently with a torch can expand the metal, easing the removal process.
Preventing Damage During Rust Removal
It’s important to balance force with caution. Excessive force on rusted parts can lead to breakage. Techniques like gradual torque application and gentle tapping can be effective in loosening without damaging.
Post-Removal Engine Inspection
Once the 5.3 engine is removed, it’s an opportune time to perform a thorough inspection. This can reveal underlying issues or maintenance needs that might have been overlooked while the engine was mounted.
Inspection Checklist
Key areas to inspect include the engine seals and gaskets, the condition of the timing belt or chain, and any signs of wear on moving parts like pistons or rods. Also, inspect for any cracks or damage to the engine block itself.
Addressing Identified Issues
Finding issues during an inspection allows for timely repairs or replacements, ensuring the engine is in top condition before reinstallation. This can save time and resources in the long run and enhance the overall performance of the vehicle.
Reinstallation Considerations
Reinstalling the engine requires as much precision as removing it. Proper alignment and connection of all components are crucial for the engine to function correctly.

Ensuring Proper Alignment
Carefully aligning the engine with the transmission and motor mounts is critical. Misalignment can lead to significant problems or damage. Using guide pins or alignment tools can aid in this process.
Reconnecting Components
Attention to detail is vital when reconnecting electrical, fuel, and cooling systems. Ensuring every connection is secure and correctly placed is fundamental to avoid post-installation issues.
Factors That Determine The Length Of An Engine Replacement
The length of time for an engine replacement is influenced by various factors.
Firstly, the complexity of the vehicle model plays a significant role. Some models have more accessible engine compartments, making the replacement process quicker.
Secondly, the mechanic’s experience and expertise are crucial. Experienced technicians can navigate the replacement process more efficiently than novices. The availability and use of specialized tools can also expedite the process.
Additionally, the condition of the vehicle, particularly if there are rusted or corroded parts, can extend the time required for replacement. Preparing the workspace and having all necessary parts and tools at hand can significantly reduce downtime during the replacement process.
What Is The Labor Time To Replace An Engine In A 2006 Chevy?
The labor time to replace an engine in a 2006 Chevy, specifically models equipped with a 5.3 engine, typically ranges from 10 to 15 hours. This estimate can vary based on the specific model of the Chevy and the condition of the vehicle.

Factors such as additional repairs that might be needed during the engine replacement, the work environment, and the tools available can also influence the total labor time.
It’s important to note that this time frame is for professional mechanics working in a well-equipped shop and may be longer for individuals undertaking the replacement in a home garage.
Any GM Techs Know Book Labor Hours For Engine Swap?
For General Motors (GM) vehicles, the book labor hours for an engine swap can vary widely depending on the model and year of the vehicle.
For instance, a standard engine swap in a GM truck or SUV, like those with a 5.3-liter engine, might be listed as approximately 12 to 20 hours in professional labor guides. These guides, used by GM technicians, offer a standardized benchmark for labor times but are not absolute.
They account for the average time a skilled mechanic would take under normal conditions. The actual time can be influenced by factors such as the condition of the vehicle, any unforeseen complications, and the mechanic’s level of experience and efficiency.

Conclusion
In conclusion, the process of removing a 5.3 engine can vary in duration based on a multitude of factors, from the mechanic’s expertise to the specific vehicle model. By adhering to safety measures, preparing adequately, and utilizing the right tools, one can successfully navigate this task within a reasonable timeframe.
The key is to approach the process methodically, ensuring each step is performed with precision and care. With the right approach, removing a 5.3 engine can be a manageable, even gratifying, undertaking.
Frequently Asked Questions
What are the key steps in the reinstallation process of a 5.3 engine?
Key steps include carefully aligning the engine with the transmission, securing it to motor mounts, and reconnecting all electrical, fuel, and cooling systems accurately. Double-checking each connection and testing all functions before complete reassembly is also essential.
How important is labeling during disassembly?
Labeling each part during disassembly is crucial for a smooth reassembly process. It helps in tracking all components, especially wiring and hoses, to ensure they are reconnected correctly.
How do I prepare my workspace for engine removal?
Prepare your workspace by clearing enough room to maneuver, organizing your tools for easy access, and ensuring the ground is level and stable. Good lighting and a clean, uncluttered space are also crucial.
Can I remove a 5.3 engine alone, or do I need help?
While it’s possible to remove a 5.3 engine alone, having assistance can make the process safer and more efficient. An extra set of hands is particularly useful for managing heavy components and ensuring stability.
Is it necessary to drain fluids before removing the 5.3 engine?
Yes, it’s essential to drain all fluids like oil, coolant, and transmission fluid to prevent spills and potential hazards. This also reduces the engine’s weight, making it easier to handle.

Welcome to the exhilarating world of Matt Rex, a professional car racer turned renowned vehicle enthusiast. Immerse yourself in his captivating blog as he shares heart-pounding adventures, expert reviews, and valuable insights on cars, trucks, jets, and more. Fuel your passion for speed and discover the beauty of vehicles through Matt’s engaging stories and meticulous expertise. Join the ever-growing community of enthusiasts who find inspiration and expert advice in Matt Rex’s blog—a digital hub where the thrill of speed meets the pursuit of knowledge.


![1995 Polaris SLT 750 Problems [All You Need To Know]](https://www.turbochaos.com/wp-content/uploads/2023/07/1995-Polaris-SLT-750-Problems-768x512.jpg)